How to roll sushi in 6 simple steps
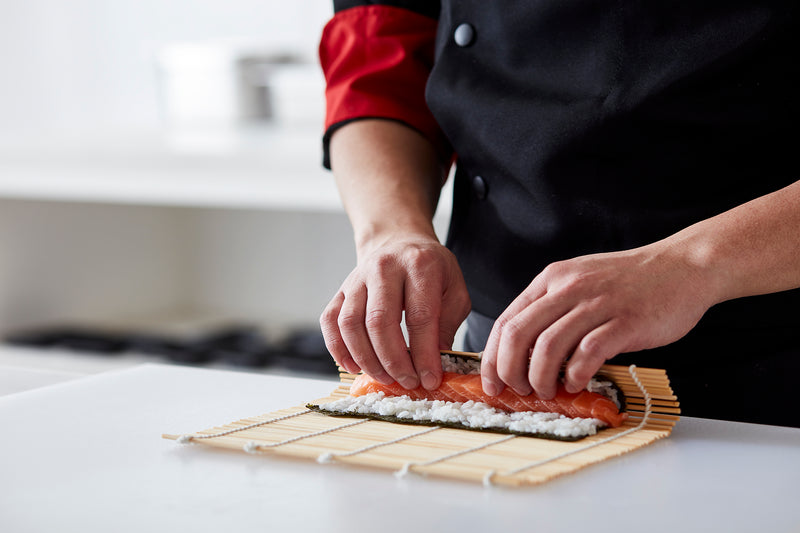
There’s no doubt that sushi tastes best when it's freshly made with high-quality ingredients: firm, shiny fish and rice that separates in your mouth. If you have authentic sushi ingredients (that’s where we come in)...rolling your own sushi is fun! We explain how to roll sushi at home, step-by-step.
How to roll sushi using a traditional bamboo mat
Rolling sushi at home takes some practice, so following these steps will guide you at first, but you’ll soon be doing it without a second thought.
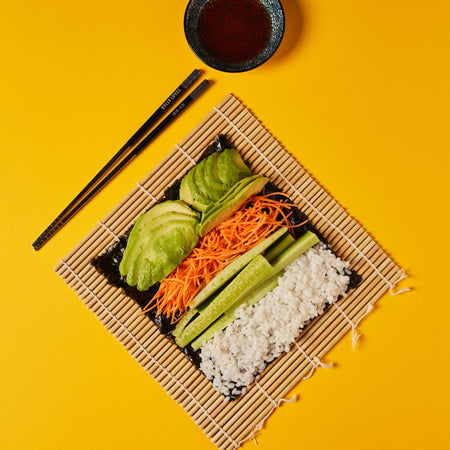
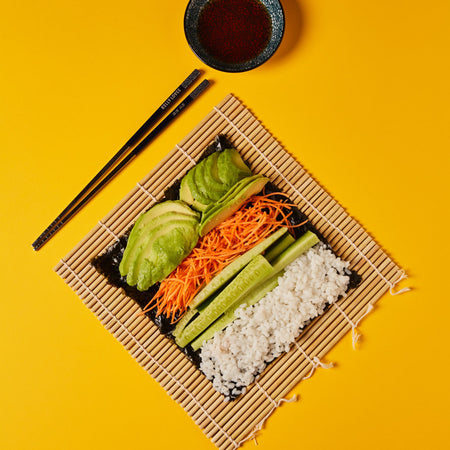
Step 1: Firstly, get everything ready. Prepare all of your ingredients, including slicing your fillings and making a batch of sushi rice. Use sushi-grade raw fish, but if you’re unsure about using raw fish, use vegetables or cooked prawns and flaked fish instead. Then you’re ready to spread out your bamboo rolling mat. You can put a piece of cling film across the mat to keep the mat clean, if you wish.
Step 2: Take your sheet of dried seaweed (nori) and lay it with the rough side facing up.
Step 3: Spread the sushi rice over the sheet of nori with damp hands, making sure to leave space at the top and bottom of the sheet.
Step 4: In the centre of the sheet of nori, around halfway between the top and bottom of the sheet, place your chosen ingredients.
Step 5: Put your thumbs underneath the bamboo mat and lift the edge that is closest to you up, folding it over the filling in the middle. To stick the filling and the rice together (so that the final result isn’t too loose), place your fingers over the curve of the bamboo mat and gently press along the length of the rolled log shape.
Step 6: Fold it underneath your hands by pulling the edge of the bamboo mat towards you, continuing to roll the sushi away from you until you've rolled past the far edge of the seaweed sheet.
Can you roll sushi without a mat?
Yes, you can roll sushi out with parchment paper if you haven’t got a sushi mat. Let us explain exactly how to roll sushi without a mat:
- Place a sheet of nori (bumpy side up), on the piece of parchment paper. You need to cut the parchment paper so that it’s a few inches bigger than the nori sheet at the top and bottom. Then spread the sushi rice evenly over the sheet of nori with damp hands.
- Place your fillings along the centre of the sheet, on top of the layer of rice.
- Roll the nori into a tight log shape using the parchment paper.
- Seal the edges of the nori at the seam with wet fingertips. Using a sharp knife (this is key), cut the roll crosswise into rounds.
This is a useful method if you haven’t got a sushi mat to hand, but making sushi is so much easier if you have the right tools. Investing in a firm sushi mat is the easiest, most environmentally friendly option and also the most authentic. A bamboo mat is used by professional sushi chefs to assist in the rolling process (and if properly taken care of, a single mat can last for years!).
Tips and tricks for rolling sushi
Making sushi rolls at home takes a bit of practice, so we’ve got some more useful tips and tricks:
✔ Make sure the knife you use to cut the sushi is sharp for clean cuts.
✔ Wipe the sharp knife with a wet cloth in between each cut – to stop the rice from sticking.
✔ Remember that ‘failed’ sushi rolls might look a little messy, but they’ll still taste good!
✔ If you want to prepare your homemade sushi ahead of time, put it into an airtight container and pop it in the fridge for up to one day.
✔ Rolling sushi at home is great for using up leftovers. Leftover
cooked vegetables work particularly well.
✔ Get creative with flavours – try adding sesame seeds or kimchi.
Rolling sushi at home can be a lot of fun and you can involve friends and family. Does your household enjoy Taco Tuesdays or Fajita Fridays? Why not add mouth-watering Sushi Saturdays to your week! By creating a ritual and tradition, you can all look forward to the weekly preparation and mealtime together.
Whether you’re housemates, a family or you invite guests over each week, you’ll be surprised at how quick and easy rolling sushi becomes.

